Cluttered closets, overflowing garages, and chaotic kitchen cabinets don’t happen by accident, they’re the result of a mismatch between storage and lifestyle. Modular storage solutions are redefining how homeowners and renters approach organization by offering flexibility that grows with your needs. Unlike built-ins that lock you into fixed configurations, modular systems adapt as your life changes. Whether you’re downsizing, expanding a family, or simply tired of fighting chaos with cardboard boxes, modular storage works. This guide walks you through what modular storage is, why it matters in 2026, and how to choose and install systems that fit your space and budget without requiring a contractor’s license.
Table of Contents
ToggleKey Takeaways
- Modular storage solutions adapt as your life changes, allowing you to expand or reconfigure systems without contractors or permanent damage, making them ideal for renters and homeowners alike.
- Starting at just $30–$80 per unit, modular storage offers a budget-friendly alternative to custom built-ins costing $3,000–$8,000, with the flexibility to scale incrementally.
- Proper installation requires anchoring to wall studs with heavy-duty fasteners and using a level to prevent sagging; never rely on drywall anchors alone for heavy loads like books or tools.
- Modular storage systems can reclaim 20–40% more usable space by eliminating wasted gaps and optimizing vertical storage in bedrooms, offices, and kitchens.
- Audit your storage needs first, measure your space honestly, and plan for 20% extra capacity to accommodate future growth and prevent costly overhauls.
- Material selection balances durability and weight: solid wood lasts longer, MDF suits lightweight items only, and metal-frame hybrids offer strength with easier installation.
What Are Modular Storage Solutions and Why They Matter
Modular storage refers to any storage system built from independent, interchangeable components that stack, clip, or bolt together to form larger configurations. Unlike a single bookcase or filing cabinet, modular units are designed to expand horizontally or vertically. You might start with two cube storage units and add four more months later, no contractor, no drywall damage, no commitment.
Why does this matter now? Rising housing costs mean people are living in smaller spaces longer. Modular systems maximize vertical and underutilized corners without eating up floor area like traditional furniture. They also sidestep the “renting vs. owning” frustration: you can take modular units with you when you move. Compared to custom built-ins costing $3,000–$8,000, modular solutions start at a few hundred dollars. According to recent storage solutions trends 2026, demand for flexible, scalable storage is outpacing fixed installations because life rarely stays the same.
Key Benefits of Choosing Modular Storage for Your Home
Flexibility and scalability sit at the top. Add units as your needs grow, no redesigning your whole closet or office. A modular shelving system in a bedroom can transition to a garage workbench setup without waste.
Affordability is real. Entry-level modular cubes run $30–$80 per unit. Mid-range drawer systems and wall-mounted shelves range from $150–$500. Even high-end, premium-material modular collections rarely exceed $2,000 for a full room setup. You control the budget and expand piece by piece.
Portability solves the renter’s dilemma. Bolt-together systems aren’t permanent fixtures, no nail holes that trigger deposit disputes. This also appeals to homeowners who like refreshing their layouts every few years.
Customization without tools is a game-changer. Many modular systems use cam locks, click-together connectors, or no-drill mounting. You won’t need a miter saw or a helper (though a second pair of hands speeds assembly).
Storagetrends also show that storage solutions strategies emphasizing modular approaches help people reclaim 20–40% more usable space by eliminating wasted gaps and dead zones. When a system adapts to your actual layout instead of forcing you to adapt to it, organization feels less like a chore.
Popular Types of Modular Storage Systems
Cube Storage Units and Wall Shelving
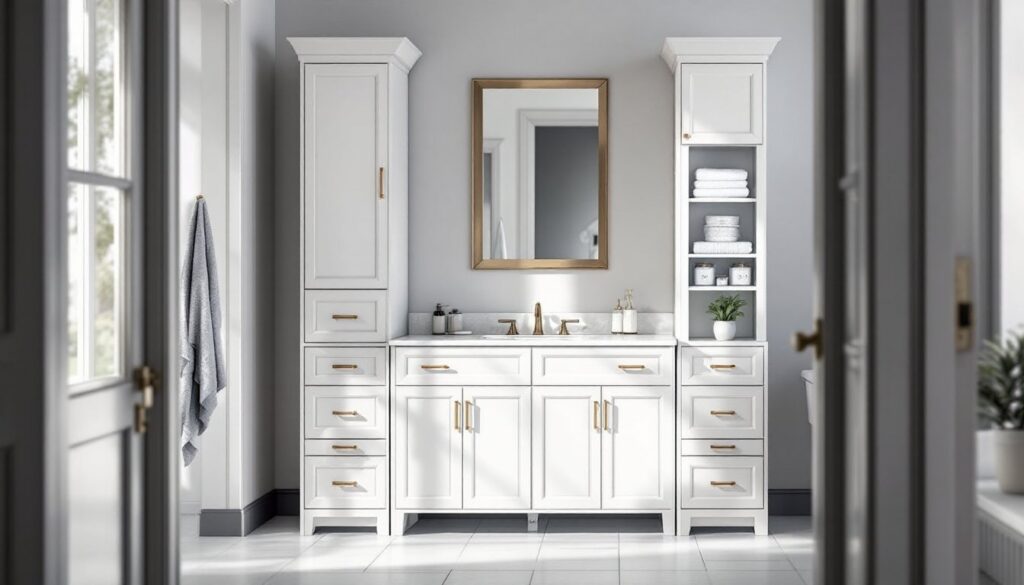
Cube storage is the workhorse of modular organization. Think of a grid of square compartments, typically 13×13 inches to 15×15 inches per cube, stacked into larger units. They’re available with or without backing panels and in wood, metal, or plastic. Open cubes display decorative items and keep frequently used stuff visible: closed cubes hide clutter and protect contents from dust.
Wall-mounted shelving takes cubes vertical. Floating shelves attach directly to studs via L-brackets or French cleats (a method involving two angled wooden pieces that distribute weight evenly across wall framing). Wall shelving saves floor space in bedrooms, home offices, and kitchens. Ensure you anchor into solid studs if hanging heavy loads, drywall anchors alone won’t support books or power tools. Spacing shelves 12–16 inches apart balances accessibility with density.
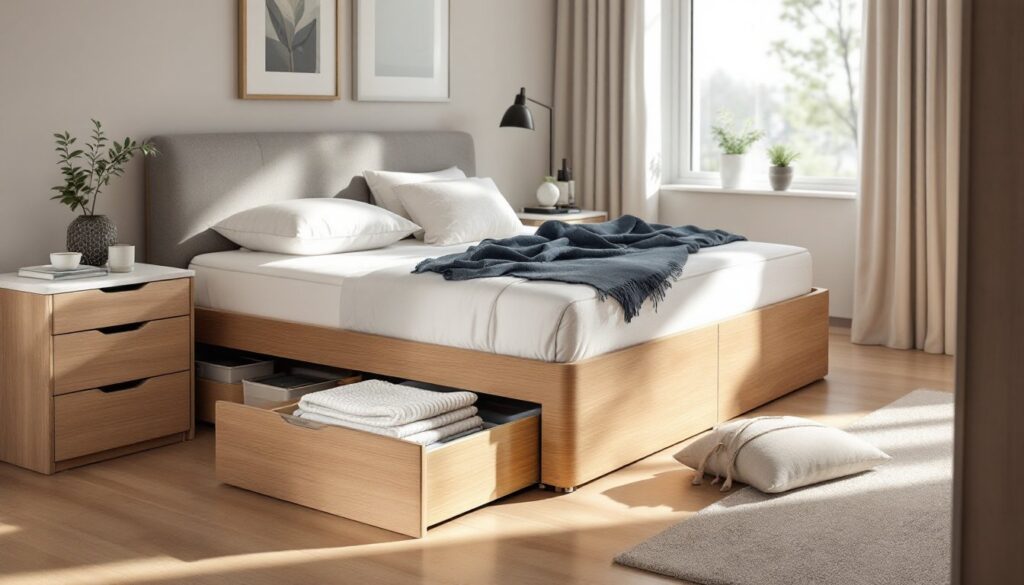
Drawer Dividers and Container Systems
Drawer dividers break large drawers into zones. Modular dividers (often plastic or wood) slide into adjustable tracks, letting you resize compartments as needed. This transforms a jumbled junk drawer into sorted zones for chargers, pens, and hardware.
Container systems, stackable bins, clear acrylic boxes, or labeled totes, pair with shelving or drawer space. Transparent containers let you see contents without opening them, a small efficiency that prevents duplicate purchases. Containers in consistent depths (typically 4 inches, 6 inches, or 8 inches) stack neatly and maximize vertical use. Look for containers labeled for moisture resistance if storing items in basements, garages, or humid climates.
Both approaches require minimal installation. A carpenter’s level and a drill (if wall-mounting) are your main tools. Building codes don’t apply to storage itself, but weight ratings matter: a shelving unit rated for 100 pounds per shelf shouldn’t hold books beyond that limit.
How to Choose the Right Modular Storage for Your Needs
Start by auditing what you’re storing. Clothing, tools, seasonal decor, pantry items, and electronics all have different footprints and accessibility needs. Tall, skinny items (wrapping paper, fishing rods) suit vertical cubes or narrow shelving. Wide, flat items (board games, art supplies) need deeper shelves or wider compartments.
Measure your space honestly. Note ceiling height, available wall length, and how much floor space you can spare. Don’t assume a unit “will fit” until you verify clearance for doors, windows, and foot traffic. Many installations fail because the unit blocks a closet door or makes a hallway a bottleneck.
Weight matters more than you’d think. Books and tools are deceptively heavy, 20 pounds per linear foot is a realistic estimate. Check the product’s weight capacity, and if you’re anchoring to drywall, invest in heavy-duty anchors rated for your load, not the flimsy Phillips-head anchors that come with budget units.
Estimate future growth. If you’re organizing a young family’s toys, plan for expansion. If it’s a home office, consider whether remote work will expand or shrink. Building in 20% extra capacity prevents a costly overhaul in two years.
Material choice balances durability, weight, and price. Solid wood cubes are heavier but last longer and handle more abuse. MDF (medium-density fiberboard) is lighter, cheaper, and adequate for lightweight items, avoid it for heavy loads or damp areas where swelling becomes an issue. Metal frames with wooden shelves offer a hybrid approach: strength with lighter installation.
DIY Tips for Installing and Customizing Modular Storage
Assembly prep prevents frustration. Lay out all pieces and hardware on a clean floor before fastening anything. Sort bolts, cam locks, and brackets by size. This “dry run” catches missing parts and lets you spot assembly mistakes before they’re stuck together.
Level is non-negotiable. A single shelf off by 1/4 inch per 4 feet will visibly sag and stress joints. Use a 2-foot or 4-foot level on each shelf and the unit’s frame. If the floor is uneven, use shims (thin wooden wedges) under the feet, not wobbling shelves.
Wall anchoring requires studs. Locate studs with a stud finder ($15–$30 for a basic magnetic or electronic model). If mounting to studs, 3-inch wood screws or bolts work well. If studs don’t align with your preferred placement, toggle bolts or molly bolts rated for your load are your fallback, not ideal, but workable for light to medium loads. Never trust drywall alone for heavy shelving.
Load distribution extends system life. Don’t pile all heavy items on the bottom shelves, spread weight across multiple units. Unbalanced loads twist frames and stress joints.
Customization hacks make modular systems truly yours. Paint cubes to match decor or add fabric backing for a softer look. Peel-and-stick wallpaper inside cubes hides raw particle board. Felt pads under storage containers protect hardwood floors and let you slide units for cleaning. For inspiration, explore DIY modular storage cubes and other online communities where people share creative tweaks.
Consider adding adjustable feet if your floors are rough. Threaded feet let you fine-tune leveling without wedges, and they’re easier to adjust if your household shifts furniture seasonally. Most are under $10 per unit.
Safety notes: Wear safety glasses when assembling, bolts and springs can surprise you. If hanging shelves above a desk, bed, or seating area, verify the installation can handle the load securely. A falling shelf is a serious hazard. If you’re uncertain about your wall’s capacity, hire a handyperson or contractor for that section.
For advanced customization, some homeowners DIY modular units from scratch using plans from platforms like Ana White. Building modular cubes yourself requires basic carpentry (circular saw or miter saw skills, measuring, drilling), but it cuts costs and ensures perfect sizing for awkward nooks. Expect to spend 6–8 hours for a 2×2 cube unit if you’re not experienced.