Craft supplies have a way of multiplying. One day you’ve got a modest stash of yarn and markers: six months later, your bedroom looks like a craft store exploded in it. Whether you’re into woodworking, sewing, painting, or collecting supplies for a dozen different hobbies, clutter kills creativity. Smart craft storage solutions don’t just reclaim floor space, they make your hobbies more enjoyable and productive. You spend less time hunting for scissors and more time making things. This guide walks you through practical storage options, from container systems to DIY builds, designed to fit real homes and real budgets.
Table of Contents
ToggleKey Takeaways
- Organized craft storage solutions improve productivity by making supplies visible and accessible, reducing time spent searching for materials and encouraging more frequent creative work.
- Clear, labeled containers with tight-sealing lids protect craft supplies from dust and moisture while allowing you to see contents at a glance without opening bins.
- Vertical storage using pegboards, floating shelves, and wall-mounted systems maximizes space efficiency in small rooms while keeping frequently used items at eye level.
- DIY craft storage projects like custom shelving units and wall-mounted tool racks can save money while perfectly fitting your specific space and hobby needs.
- Space-saving craft storage ideas for small apartments include under-bed bins, over-the-door organizers, corner shelving, and closet organization that turns overlooked areas into functional supply hubs.
- Multi-purpose furniture like storage ottomans and rolling carts combine craft storage with functional seating or mobility, making them ideal solutions for spaces that double as living areas.
Why Organized Craft Storage Matters for Your Hobby
Disorganized supplies create friction. You can’t remember what you already own, so you buy duplicates. You waste time digging through piles instead of creating. Worse, materials degrade faster when exposed to dust, moisture, or sunlight, ruined supplies mean wasted money and lost projects.
Effective craft storage serves three purposes: accessibility, protection, and space efficiency. When supplies are visible and easy to grab, you’re more likely to actually use them. Proper containers protect delicate items from damage. And a well-organized system means you can fit twice as much into the same footprint.
The key is matching your storage to your specific hobbies. Painters need different setups than quilters, and someone who crafts occasionally needs less infrastructure than someone with a dedicated studio. Before buying bins and shelving, take inventory of what you’re actually storing and how often you access it. Storage solutions guide: how to organize any space efficiently can help you think through your specific needs.
Essential Storage Containers and Organization Systems
Clear Bins and Labeled Systems
Clear plastic storage containers are the foundation of any craft room. Unlike opaque bins, you can see contents at a glance without opening them. Look for heavy-duty polypropylene bins with tight-sealing lids, these resist warping and keep moisture and dust out. Avoid ultra-cheap thin-wall containers: they crack easily and don’t seal reliably.
Size matters. A 27-quart bin works well for yarn or fabric scraps, while smaller 6-quart boxes suit buttons, threads, or beads. Nesting designs save space when empty. Label every bin with waterproof labels, not just what’s inside but also the quantity or date acquired. A label maker is worth its cost, handwritten labels fade and peel.
Group related supplies together: all painting supplies in one zone, all sewing notions in another. Use storage solutions tools: organize your space with the right equipment to evaluate what container styles work best for your workflow.
Wall-Mounted and Vertical Storage Options
Vertical storage is essential for small spaces. Pegboards are the workhorse, mount a sheet of 3/4-inch hardboard on any stud wall, paint it, and hang hooks, baskets, and shelves to suit your collection. Pegboards handle moderate weight well (check weight ratings for brackets) and can be reconfigured as needs change.
Alternatively, install floating shelves at 8-12 inches apart to display frequently used supplies and keep them within reach. Shelves also break up visual clutter by letting you arrange supplies by color or type. For heavier loads (wood supplies, metal stock), ensure shelves are mounted directly into wall studs, not just drywall anchors.
Wall-mounted wire grid systems or slatwall panels offer flexibility too. They’re easier to install than shelves and hold lightweight items well. Keep height in mind, the most-used supplies should be at eye level, with occasional items higher up.
DIY Craft Storage Projects You Can Build This Weekend
If you enjoy building things, a custom storage unit can save money and perfectly suit your space. A simple shelving unit is a great starter project. Build a basic frame from 2×4 lumber, with 3/4-inch plywood shelves resting on supports or dados. Mount it to wall studs for stability, a loaded unit can exceed 200 pounds.
Step-by-step outline:
- Measure your wall and available height: plan shelf spacing based on what you’re storing.
- Cut frame pieces and shelves square and to exact length.
- Drill pocket holes or use lag bolts to secure the frame to studs.
- Install shelves with adjustable shelf pins (easier to reconfigure later) or glue and screw them permanent.
- Sand, prime, and paint or stain: use paint rated for moisture resistance if your space gets humid.
- Add edge banding to plywood fronts for a finished look.
For a hanging storage system, build a wall-mounted tool rack. Mount a 1×8 board horizontally at waist height, add hooks below for hanging supplies, and install a small shelf above for containers. This keeps small, frequently used items at arm’s reach.
Complex projects like rolling carts or floor-to-ceiling shelving units demand more precision and stronger fastening. If you’re new to building, start simple, a basic shelving unit teaches you alignment, fastening, and finishing without overwhelming complexity. Real Simple’s craft storage ideas showcase variations you can adapt to fit your space.
Space-Saving Storage Ideas for Small Spaces
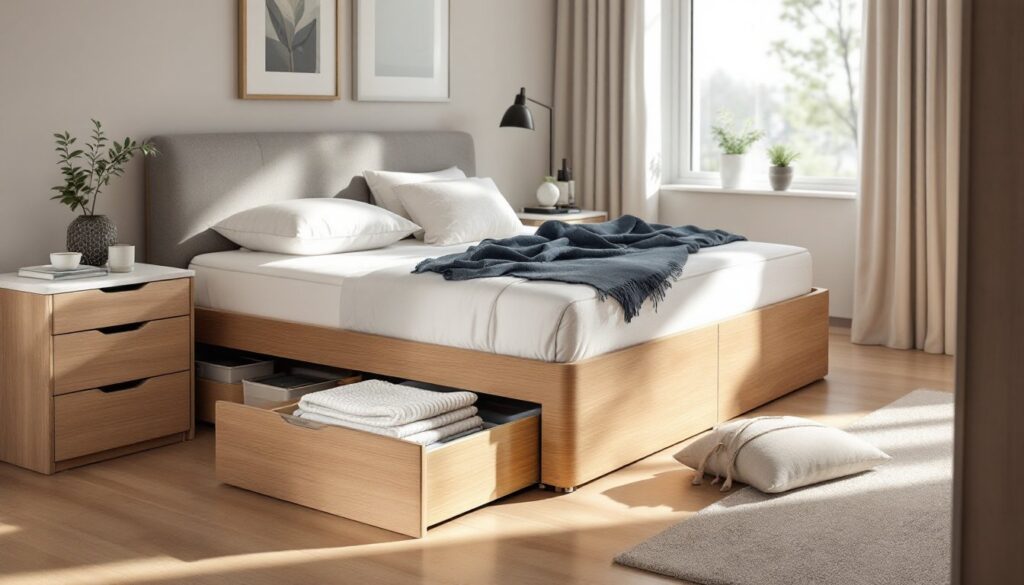
Small apartments and bedrooms demand cleverness. Under-bed storage using flat rolling bins or pull-out drawers captures dead space. Use these for lightweight, occasionally accessed items, heavy loads create strain on bed frames and make cleaning difficult.
Over-the-door organizers with clear pockets work for threads, markers, or small tools. They’re simple to install (no tools required, just adhesive hooks) and invisible when the door is closed. Just ensure the door swings freely and won’t hit the organizer.
Corner shelving units maximize unused corners. A 5-shelf corner unit occupies minimal floor space while holding substantial supplies. Mount it flush to the wall to avoid tripping hazards. Storage solutions ideas to maximize your space explore corner solutions in detail.
Closet organization is often overlooked. Install a rod above existing coat hangers for hanging fabric, yarn, or pegboards. Add shelving above the rod. Closets stay temperature-stable and out of sight, making them ideal for supplies you access weekly rather than daily.
Vertical hooks on inside closet doors hold bags, rolling carts, or wall organizers. A small rolling cart tucked into a closet corner provides mobile storage you can pull out when crafting. Ensure pathways remain clear, storage shouldn’t block exits or create fire hazards.
Pro tip: Multi-purpose furniture doubles as storage. A storage ottoman holds supplies while serving as a seat. A rolling cart with drawers works as mobile storage you can push to different rooms. These options work especially well when your craft space doubles as a living area.
Conclusion
Craft storage isn’t just about tidiness, it’s about removing barriers between you and your creative work. Start by assessing what you actually own and how you use it, then build a system that matches your habits. Whether you choose ready-made containers, DIY shelving, or a mix of both, the goal is making supplies visible, accessible, and protected. Instructables has detailed tutorials for custom storage builds if you want step-by-step guidance. A well-organized craft space invites you to create more often and finish projects faster.